
If you have a website that has a contact form on it, then you probably often receive spam messages coming from the forms on your website. Since these messages are in most cases sent by software bots, this can become a fairly large number of messages that overwhelm your inbox with spam every day. Fortunately, there is a good solution to this problem and it is called CAPTCHA.
In this blog, we will explain how to install one of the most popular CAPTCHA services in the world – Google reCAPTCHA.
CAPTCHA is a specific type of test that a website user needs to solve in order to be allowed to send a message via the contact form or perform any other activity on the form (registration, logging in, subscribing to the newsletter, etc.). In fact, by solving the test, the CAPTCHA software identifies whether the user is a human or a bot.
Please note that there is no 100% protection against bots, but with the help of reCAPTCHA, you will stop most malicious bots from spamming your inbox and overloading your web server.
reCAPTCHA
Google has several versions of reCAPTCHA – reCAPTCHA v2, and reCAPTCHA v3 are the most commonly used versions today. The reCAPTCHA v1 version ceased to exist in March 2018.
Let’s briefly explain the difference between these two versions:
ReCAPTCHA v2 is a test that, along with the form offers you the option to check the ‘I am not a robot’ button and thus confirm that you are a human and not a bot. If the software estimates that there are no suspicious activities on the form, it will only offer the option to check the mentioned field. Otherwise, it will give you a test, that you have probably often seen on websites, it consists of several squares with pictures that you need to check on request. So, the user has to identify in some way that he is a person, not a bot, which obviously requires solving this type of test. This is also the most popular version of reCAPTCHA.
ReCAPTCHA v3 is a newer (and improved) version of this software. Unlike reCAPTCHA v2, this version means that the user does not need to identify himself immediately by solving a test, but the software applies silent background analysis to identify malicious behavior in the form of a bot using AI. Each visitor to your form is assigned a score based on which the software determines further steps (eg to request additional user identification, to notify the webmaster..etc). This version requires a little more work to be implemented on the website.
Setting Up reCAPTCHA v2
To register, firstly go to the reCaptcha console. As with other Google services, you need to sign up with your Gmail account.

After registration, enter the Admin Console, on the top right corner.
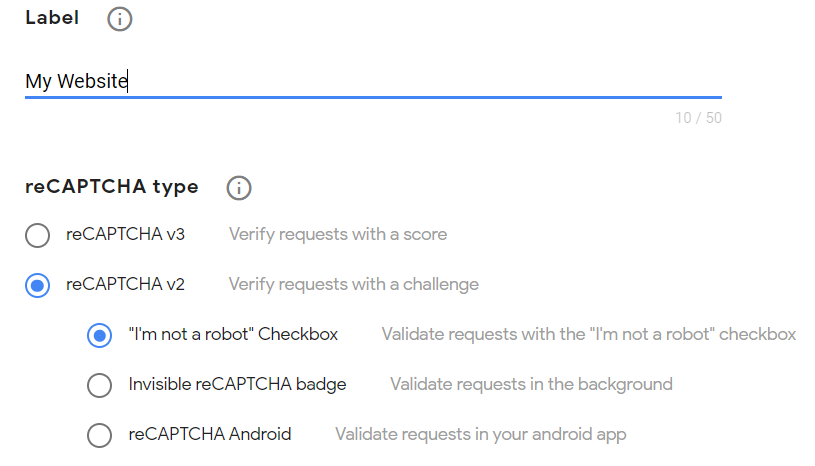
Now you need to register your site. Enter a profile name in the Label field (optional – eg site name). Now in the reCAPTCHA type section, you need to choose which version of reCAPTCHA you want to register. We select reCAPTCHA v2 and left it on the default ‘I am not a robot’ Checkbox.
Next, enter the domain name in the Domains field (without https: //), for example, www.mywebsite.com, and in the Owners, section enter the email address to which you want to receive notifications.

Note that in the Security Preference section you have the option to adjust detection sensitivity. We recommend leaving this at the default value or changing it if necessary, depending on whether you need a higher or lower level of sensitivity.
Check the button to accept the Terms of Service and click Submit to create an account.
The account has now been created and with it two keys (SITE KEY and SECRET KEY). With these keys, you can complete the registration of the Google reCAPTCHA service through your website and implement this protection on the forms. So do not close the page with these keys, but immediately enter the dashboard of your WordPress site and enter these keys in the contact form.
Depending on which plugin you use for the form, you need to find the part in the settings where you can enter these keys. There are many forms, so we will not discuss a specific one in this text. But whichever of the more popular forms you opt for, surely each of them has the option to add a reCAPTCHA service.
Copy both keys to the corresponding fields inside the form plugin, so that the service is immediately active. Once you’ve saved your changes, make sure they’re applied to your website. If they are, you should see the following image below your form.

This completes the implementation of the reCAPTCHA service on your website. If you have several forms on the site, re-register using the same keys for each of them.
We hope this article was helpful. Until our next blog, stay spam-free 👋