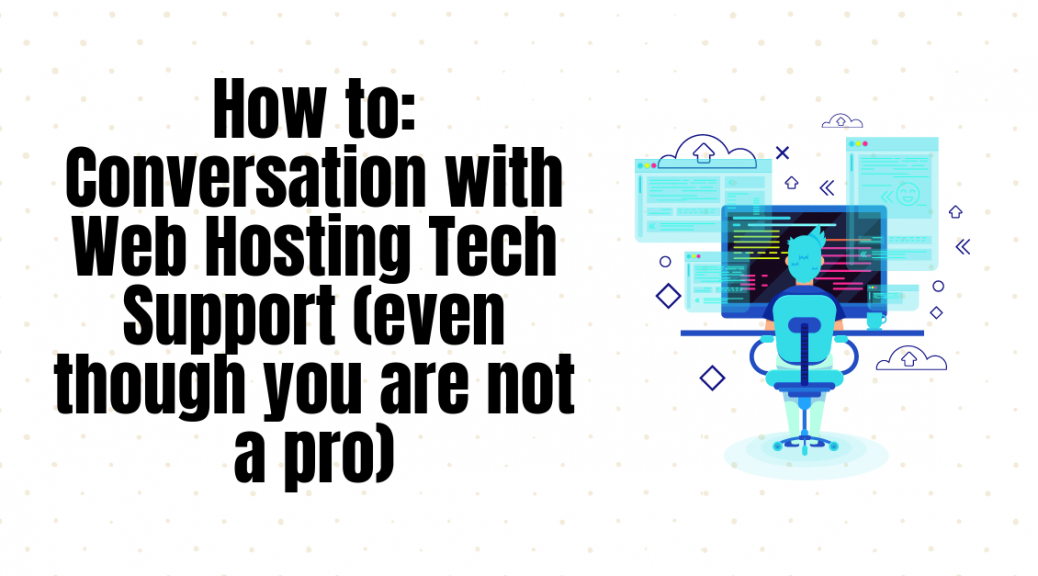
We know, sometimes, contacting support could be a tiring and unpleasant activity for you. Finding the right contact, wading through support options, and actually communicating in a constructive way is all easier said than done. You already have the stress of dealing with a problem with your website or hosting, so the last thing you need is to struggle to actually resolve your issue. Right?
But, Customer supportteams are very, very important. According to a survey, service insight and knowledge is the key to a positive experience with 62% of customers today.
Yet, we very rarely walk away from web hosting tech support feeling the problem was taken care of successfully. Much of this comes down to choosing a quality web host that’s known for their service, but it also comes down to poor communication. Luckily, with a few key steps, you can successfully converse with your web hosting tech support to get the problem solved fast.
Start with the Right Host
Of course, most of your basic hosting problems could be solved by choosing the right host in the first place. There are a lot of options today for getting more out of your internet hosting. However, if you don’t do your due diligence, you could end up in a spot where you’re unable to reach tech support at all.
If possible, make a switch to a reputable web host. Today. We’ll wait. The right host will value customer support, and they know challenges pop up for webmasters from time to time. Not only will they have experience solving problems, but they can take a proactive approach.
Use Online Documentation
Before you skip to using tech support, see if you’re able to take some steps first to mitigate the problem. Most web hosts have extensive online documentation to help you solve the problem on your own. This documentation will help you discover the problem and take preliminary steps to solve it. Only if you’re unable to find any success with this method should you move on to the next step.
Find Online Tutorials (or Host’s Knowledge base)
If you’re experiencing a problem, odds are you aren’t the first one. Your host might already be equipped with online tutorials and solutions to walk you through this situation. If you can’t find any through your host, all hope still isn’t lost.
Try a simple Google or YouTube search. Searching “your host + problem” usually will yield a few hundred results with similar problems. There might even be YouTube videos showing you the solution in a step-by-step manner.
Use LiveChat
Online chat is a great resource. We all hate sitting on the phone waiting for the next tech support rep to become available, so why not take advantage of a modern solution. Live chat allows you to talk to your tech support agent in your browser. You can see your messages in real-time and even share supporting documents and images as needed.
Offering online chat is a great option for web hosts, so make sure yours has a chat feature.
Document Your Problem
Finally, make sure you’re ready to actually present your problem clearly and articulately to your host tech support. One of the most common problems is that the webmaster isn’t able to properly explain the problem, so the tech support agent doesn’t know how to solve your concern.
To document the problem, consider including screenshots, written documentation, or error reports. The more information you can compile, the better equipped your tech support team will be to provide the right recommendation. In some cases, these agents might be able to step in and solve the problem for you.
Contacting your web host’s customer support doesn’t have to be an unpleasant experience. Most companies are starting to catch on to the fact that making existing customers happy will actually help you sell more than finding new customers from scratch.
If you’re in need of help from tech support, be sure you properly document the problem first. From there, you’ll be in a better spot to succeed with your communications.
Imagine a scene where you are visiting a site that is functioning perfectly, but suddenly gets so choked up and spits outs the internal server error.
Hm, we are sure you don’t really like seeing the 500 internal server erroron your smooth WordPress site either.
The internal server error seems to be more common in WordPress as this type of an error does not really give out any other information which can frustrate the users and turn off from your website. This can cause some serious impacts on your site as the users start to move away from your site leading it to less customer engagement. The WordPress is not an exception when dealing with errors as these sites experience variant types of errors depending on the problem they run into. Few of the errors are resolved by proper web development techniques in a day while others might take up to days for troubleshooting the problem. Let us know at some basics of how these errors can be resolved.
What is an Internal Server Error?
Before running into depth, we need to understand why your site such error. As the name depicts, the 500 internal error takes place on the server level when the server fails to show the requested page to the user. The error itself is an application-side issue that is occurring on your web server. So, when you try to write a specific URL into the address bar or click a link on a website, you actually request the server to show you a page.
In present times, due to some reason, the server cannot show you that specifically searched page which you’re looking for to signifies an internal server error. furthermore, we can also depict the internal server error in WordPress can be caused by the functioning of plugin or theme. This error shows up only when we try to access the admin area where the rest of the site works absolutely fine.
How can you resolve it?
Many of the times, it happens that you choose not to respond to those internal errors on your hosted server which might end up compromising your whole website. Hence, it becomes a very convenient option to back up your website data on your personal server to avoid any such rush. We have mentioned a few fixes that involve tinkering with your website under the hood by making a few specific changes to your website’s root directory. Therefore, it becomes very crucial to run a backup on your WordPress site for better protection. If you have not thought of any backup plugin or some other solution for an alternative then it is a high time to think about it.
For instance, you can consider some popular tools like BackUpWordPress, VaultPress, and BackupBuddy which are used by most of the WordPress sites for data backup. If you wish to backup your database as well, then you can go for WP Migrate DB Pro or WP-CLI for running quick safety reports. To troubleshoot a problem requires a lot of time and effort. But to fix it in a persistent way, one needs to identify the deep cause of the error occurrence.
Recheck .htaccess File
If your site is running on the Apache server, there are high chances to have your .htaccess file getting corrupted. Such a situation arises when you install a few plugins or make any changes to your site. It is an easy fix overall as you just need to replace your corrupted file with the new one.
All you are required to do is create a new .htaccess file for re-saving your permalinks settings in your WordPress dashboard. In case your site is running down, it does not allow you to log into your site and so one needs to rule out this option as you will need to use FTP or cPanel for accessing your site’s files. After that, locate your .htaccess file; it is recommended to create a backup of your name before you go to replace your previous .htaccess file before the new one. For this task, you need to rename your existing file so that WordPress stops recognizing this file. Try to refresh your site and if it loads properly then you got a hint that your .htaccess file has caused the 500 internal server error.
Rise up your PHP memory limit
When you hit up your PHP memory limit, there are possibilities to get the 500 internal server error. Such a situation arises because of the poorly coded plugins when a website makes use of a bunch of plugins or has some resource-intensive plugins. For this, all you need is to fix this issue by increasing the PHP memory limit for your site which can be done in different ways can do this which involves updating your .htaccess file, php.ini file, and wp-config.php file. It is advised to refresh your site to check out if it is working properly so you can see what the reason behind the internal server error is.
Firstly, search for your .htaccessfile in the root directory of your site and type the given line:
php_value memory_limit 256M
The given command line will help to increase the memory limit to 256 MB. But, if you cannot find it then make sure to be able to view hidden files or else paste the above line to create the new one.
Next, you will find your php.ini file in the wp-admin folder in your root directory to look for the line which starts with ‘memory_limit’. If it displays 64 MB or lowers then replace it with below line:
memory_limit = 256M
Even if updating your .htaccess and php.ini files do not work, you can still increase your memory limit from your wp-congif.php file by trying the below-given line.
define(‘WP_MEMORY_LIMIT’, ‘256M’);
Save all these above-created files and then try to refresh your site in order to check if it is working or not. Moreover, you can also have a suspicion for your plugins to push your PHP memory limits or get in contact with your web host about increasing memory on the server side.
Check your Plugins and File Permissions
Ever wonder how your plugins can also cause the internal error? The outdated plugins or the ones which are not updated on a timely basis can cause compatibility issues and also the new plugins seem to be coded poorly. Sometimes, it might happen that you receive an internal server error after installing a new plugin. To figure out if any of your plugin is causing you an internal error, you need to deactivate all the plugins on the same time and again reactivate them one by one.
Still, if you cannot access your WordPress dashboard or FTP into your server then open your wp-content folder to find our plugins folder by renaming it to effectively deactivate all of your plugins. Try to refresh your site and if it starts working then the cause of your 500 error is in one of the plugin. to identify which plugin is the culprit, rename your plugins folder and refresh all of them one by one until you get the threat.
When none of the above works, it seems to have the issue with the file permissions. The files in your WordPress directory should be set to 755 or 644 if they are accidentally set to 500 error. To check the file permissions, FTP into your server and check your site’s and check your site’s directory. The below mentioned things should be checked for file permissions that are recommended by WordPress Codex.
All directories should be of 755 or 750.
Check if all the files are of 644 or 640 with an exception being wp-config.php which can be set to 440 or 400 that prevents other users on the server from reading it.
Make sure the directories are never set to 777.
Contact your Web Service Provider
After trying all the above hacks, if you still get the internal server error; it is a better option to contact your web host immediately. As in the end, it is all your host’s server logs which are able to throw some light on what is getting the error to get it resolved. In such way, you can provide your host with a rundown of what you have tried to resolve your error which simply cannot get dismissed with your site’s files. This can happen if you are on a cheaply shared service provider.
There is not an exhaustive list of fixes which you can try out for fixing 500 internal server error. It is a frustrating issue which requires a lot of troubleshooting by trying out the above-mentioned hacks. We hope the tips and tricks in this article helped to fix your internal server error in WordPress. We do expect that a little change in web development techniques for your WordPress site can do wonders for your users. Happy Learning!
About the author: Vikash Chaudhary is responsible for campaign management and planning at a development company Tatvasoft.com. When he is not working he likes to write on new trends on development and design. He has got his bylines published in many big platforms bi Readwrite, Business2community & Many more.
Whether you are looking to run an independent blog to establish yourself as a blogger or you have a blog section on your business website to boost brand awareness, there are certain things that you need to consider.
The purpose of your blog is to serve as an information hub for your audience and get them to engage, and this is exactly what the best niche blogs aim to achieve. Even though most people focus their efforts on achieving this, they forget about the user experience, which greatly contributes to how their blog will be perceived.
Your website’s speed, and the speed of your blog, is directly affected by your hosting, but how can you know whether a hosting provider is good or not? Here are the 6 server-side factors that you need to consider.
Uptime
Uptime represents the time percentage during which a server has been running effectively. Uptime is a direct indicator of how good a certain web hosting provider is at keeping their servers running. If your blog has good uptime, this means that it will be available to your visitors and this is why it is so important.
However, the issue around uptime is not that simple. Most hosting companies do not provide enough information about how their percentages are calculated. For example, if a hosting provider claims that their uptime is 99% during a day, then it means your blog will be 1% down each day which is around 15 minutes.
This doesn’t seem that much but if you look at it on a yearly basis, it means that your blog will be down for around 85 hours which is more than three days.
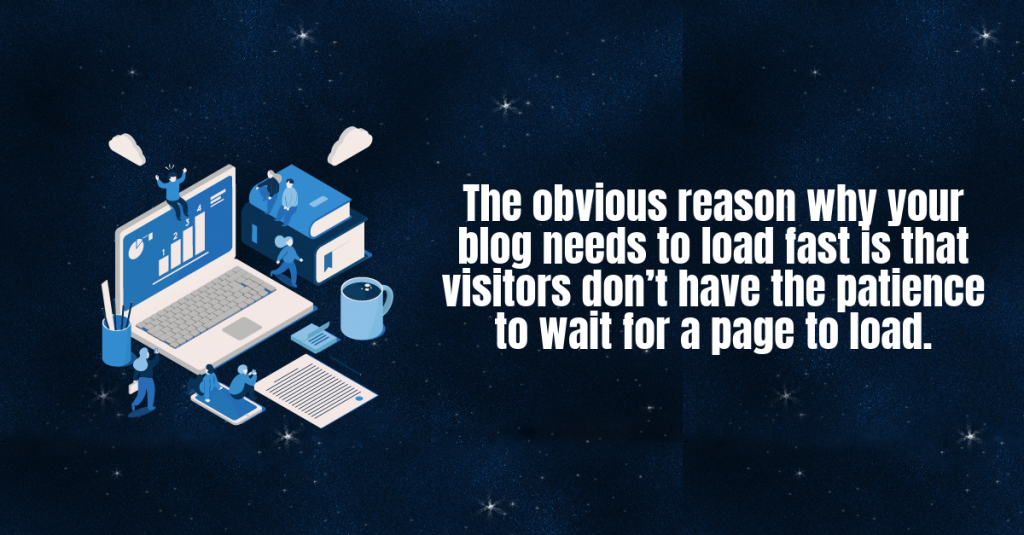
Load Time
Page loading time is an essential metric for any kind of website. The obvious reason why your blog needs to load fast is that visitors don’t have the patience to wait for a page to load. On the other hand, Google also favors sites that have good load times and this will have a positive effect on your blog’s SEO and search rankings overall.
Statistics show that over half of all website visitors will leave a site if it needs more than three seconds to open a page. This is a big number and it shows that you can’t afford slow load times as you will lose half of your potential readers. Make sure to check your load time as often as you can and work to improve it in every way possible.
TTFB (Time to First Byte)
The main underlying factor of your blog’s load time is TTFB or Time to First Byte. To put it simply, TTFB is the time required for a server to send the requested information to a user’s browser. Each time someone clicks on a page on your blog, their browser demands bytes from the server the blog is on.
TTFB affects your page load time in great measure and because of this, Google pays a lot of attention to it. Google has even offered guidelines where they recommend that your server’s first-time response must be under 200ms to be in the “green zone”.
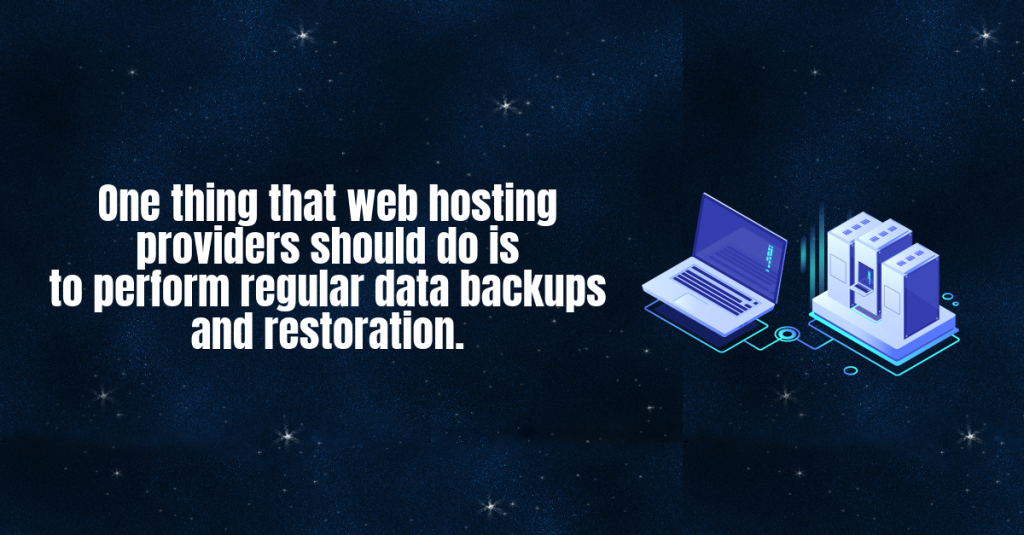
No matter how good a web hosting provider is, not everything depends on them. Human errors and random power outages can end up disabling servers and sites for a certain period of time. The risk of this happening can never be alleviated, and you can never be 100% certain. So what can you do in these situations?
One thing that hosting providers can do is perform regular data backups and restoration. Data backups are done so that, when a critical error happens on a server, your data won’t be lost and you can continue your work without issues. You won’t lose any of the content you’ve put so some much time and effort into.
Security
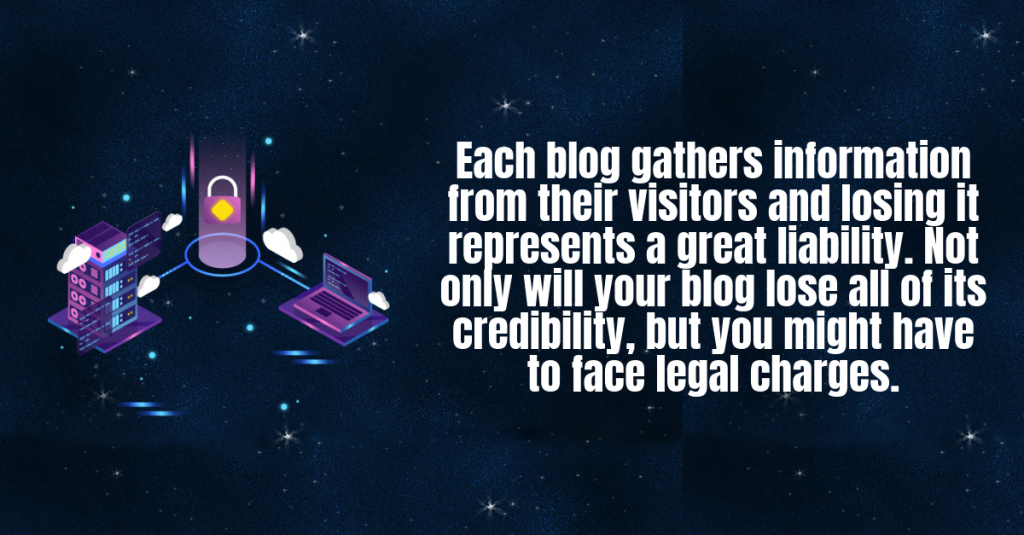
Each blog is exposed to many risks such as viruses, spyware, hacker attacks, and so on. Each blog gathers information from their visitors and losing it represents a great liability. Not only will your blog lose all of its credibility, but you might have to face legal charges.
This is why servers, as well as users, need to have security software to protect them from potential risks. Servers also have firewalls and hosting providers use custom security solutions designed for server protection. Additionally, there are also viruses designed to steal a server’s performance, causing your blog to work slower.
Server Limitations
The server itself also affects the performance of your blog. As we mentioned earlier, servers need to be located near users, so if your audience is primarily from Europe, it is best to find a host that has dedicated servers on this continent. The speed of a server is also directly affected by the amount of RAM they have and how good their hard drives are.
Another important server side factor is the type of server. Find a hosting solution with dedicated servers. Dedicated servers are just that, they are designed only for the purpose of running your blog and they don’t waste resources on anything else.
When taking all of these factors into account, it becomes clear that your hosting can greatly affect your blog’s performance. A good server is a starting point, so find a reliable hosting provider that will meet all of your needs.
About the author: Marco Mijatovic is a blogger and one of the guys behind Firstsiteguide.com. Make sure to check out his other work, including in-depth guides and posts that can help you run, start, and grow your online presence.
The issue of web hosting can be an intimidating one for some and yet for all website owners, it’s an integral part of their site. Rest assured though that you don’t really need to be terribly tech savvy to compare between hosting plans.
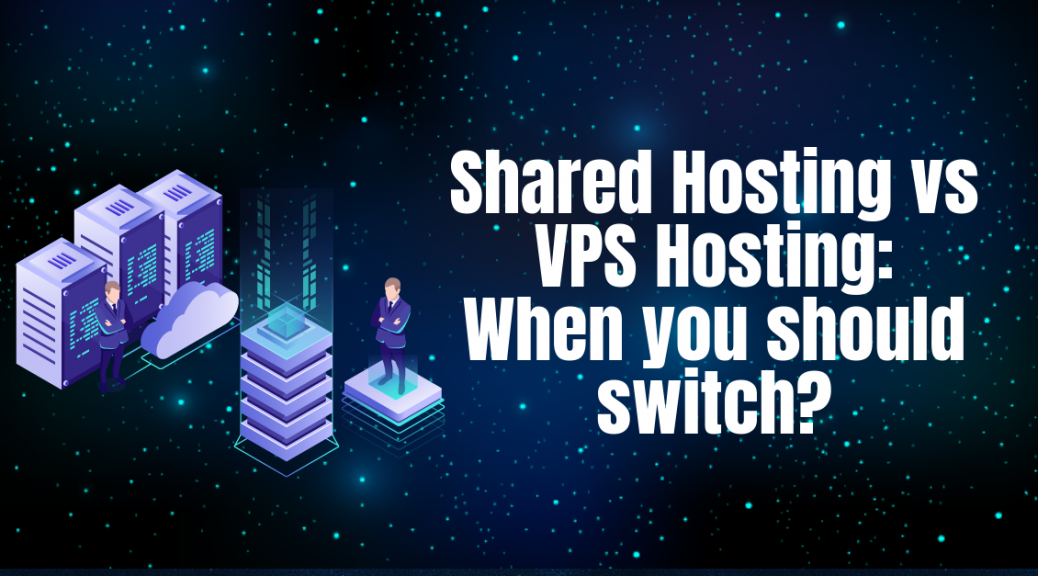
Knowing those differences can be a big help when it is time for an upgrade. Most sites are usually on free or shared hosting plans to begin with, so the next logical step up would be towards VPS hosting. VPS hosting offers more power to your site while not costing as much as a full, dedicated server.
The question though, is when do you know it’s time to upgrade? Better hosting plans are usually more expensive and the move itself may involve quite some time and effort, especially if you are considering moving to an entirely different host for the plan you want.
When to Consider Upgrading Your Hosting Plan
To mitigate any issues a shift in hosting plan may cause, it is advisable for you to plan for an upgrade before it’s time to make the move. First, let’s go through some of the indicators which may show it is time for that upgrade;
1. Performance Issues
Normally your site is zipping along smoothly but suddenly, you notice it start to slow down on occasion. Your page load times increase, and you notice visitors start to encounter errors on occasion when loading your site.
Site performance is one of the key things that let you keep visitors happy and an unreliably website can cost you dearly. Most visitors expect sites to load quickly and if it doesn’t, they will just look for an alternative.
To keep an eye on this, test your site performance regularly with tools such asPingdom or WebPagetestand ideally, keep some records. This not only helps you monitor for sharp performance drops but if you use your records right it may even help you to fine-tune site performance.
2. Increased Security Requirements
Your site has been running for a while and your audience is expanding. You’ve started getting more users subscribing for information or even join your user database for example. This means that you’re now responsible for safekeeping their data and security is coming to the fore of your mind.
While nothing can be 100% safe in terms of security, better hosting plans do usually offer better security features as well. Aside from peace of mind, this also helps you with better accountability should anything happen.
3. Resource Shortages
One you’re really tipping the limits in visitors, you may notice that your site starts cutting visitors off sometimes. This may also be followed by warnings from your host that you are hogging too much resources.
Take these warnings seriously as some hosts will not hesitate to cut off sites on shared hosting which take up too much resources. Remember, all the resources on shared hosting plans are exactly that – shared. If you take up all the time, other sites will suffer as well.
4. Exceeding Allowed Bandwidth
Some shared hosting plans place limits on the amount of bandwidth that your site can use per month. As a rule of thumb, the more visitors you are getting, the more bandwidth is taken up. Of course, there are exceptions such as if you host a lot of multimedia content as that consumes bandwidth as well.
If you see that you are using up your monthly allocation well before time, you urgently need to find a better hosting plan!
5. Your Needs Change
Shared hosts often restrict a lot of things you can do and sometimes, you may find that you need to run some applications that your host just won’t allow on shared plans. If you’re lucky, you may find an alternative that is supported on the plan but more likely than not it is time to upgrade.
Because VPS plans are often more flexible in this, you can opt to upgrade to one which will allow you to run the application you need. VPS hosting is also often better if you want to run a site with specialized needs.
Of course, there are many more reasons to look towards a better hosting plan, but these are some of the core ones. Now that you know what to look out for, let’s examine some of the differences between shared hosting and VPS hosting.
Shared vs VPS Hosting: General Differences
Image source: bacloud
Shared hosting is often cheap and lets you occupy the same server as possibly hundreds of other websites. All of them use the same set of resources, which are allocated according to certain schedules your host defines.
Shared hosting plans do not require much technical knowledge to manage since most administrative and maintenance tasks are handled by the web host.
These are the lowest tier of hosting plans available except perhaps for free web hosting. They are often very limited in the scope of service and provide you the basics and nothing else. It is ideal for smaller websites or those which have static content since they are the most cost-efficient.
VPS hosting still sees you sharing space with other sites, but generally fewer of them. Sites on VPS hosting are given dedicated virtual resources such as CPU and memory and are guaranteed a minimum amount of resources per plan.
VPS hosting plans need a little more experience and expertise to manage than shared hosting plans, but you are often given full support by the host in this.
These plans are better if you have outgrown the resources that shared plans can offer and are the next logical stepping stone for growing websites. They are more expensive than shared hosting plans but much cheaper than what a dedicated server would cost you.
These plans are great for higher volume sites or those which are on a growth trend but whose numbers are not yet able to justify the resources that a dedicated server would offer.
Now that you’re familiar with the basic concepts, you can examine the feasibility of moving hosting plans from shared to VPS hosting. By planning and monitoring your site, you can be ready to move at a moment’s notice and not panic if you suddenly face the potential issues I have mentioned.
Take your time and list down all the activities you may need to carry out a migration, be it with the same provider or a new web hosting service entirely. Remember, choosing the right host, not just the right plan, is also a vital factor when it comes to hosting.
About the author: Jason is a technology enthusiast, marketer, and a full-time dad. He loves exploring new opportunities online. He’s currently associated withBuildThis.io as the site manager.
Nowadays, you can find any business over the internet. A website is the common showcase portal for any category. Even several corporates are just creating and maintaining sites to show that they do not possess outdated strategies.
A website can’t be online without a proper domain name and extension, and good and reliable web hosting.
Domain: It is the name of the website or a business existence. By clicking the website name, a user can able to reach over the page of a particular business. Numerous intelligent consider key points while selecting a domain for their website.
Hosting: The design and look of each website are only shown through a set of files. And hosting is just like a tenant place where the business website kept those files.
It means that if any hacker wishes to hijack a website, he has to access the file(s) over hosting server. Once, he succeeded to enter the server, he can easily add, edits, or deletes files that harm your website. Therefore, it is necessary to secure the cPanel server to avoid any hacking and attack.
It is another hectic for executives to save their virtual showcase from any attack. For achieving this target, usually, they pay high to a freelance person for this job or hire a guy. Now you don’t need to pay, just follow the below steps and remain protected.
1) cPanel login must be unpredictable
A quite many times, it has been observed that people set the login credentials as simple as they can. This is a practice to remember the login details easily. But why?
Attackers investigate some of the pages and predict numerous possible username. This is the initial and helpful step in the hacking process. Website developing experts suggest changing the login initially. It should be different as compared to your business category. Keep in mind that various folks change the username which looks like the same from the hijacker’s point of view.
Example: If you are a hosting provider, and you have changed the name to “besthosting” or “hostingexpert”, it is still matching with your work. The suggestion is to make it entirely different like “expertguy” or “bestmommy”.
2) Strong password
One of the most security issues happened due to the anticipation of an easy password. The second most essential thing to keep unpredictable is a password. It should be strong. For making it authoritative, you have to include the below points:
a. The allowed length will be 26 characters, but should not be less than 8 characters.
b. At least one character of the password must be uppercase (capital letter).
c. At least one numeric character should be included.
d. A special character must be added within the password. Check the hosting portal instructions because some signs may be obligatory to use in this field. Hence, benefit from the permissible ones.
If the control panel provides a password strength calculator, then try to achieve 100% power or as closest you can.
Tip: Professional friends suggest renewing the password every six months.
2) Update cPanel
Every panel and plugin tries to upgrade their system and make it more secure without affecting the functionality. In fact, they intend to raise efficiency also. That’s why, it is recommended that whenever an update notified to you, visit the plugin channel, read which controls have been updatedand what will be the expected results. If all these analyses help you to configure that the upgrading is worthy, install the update.
Furthermore, when you notice any issue, immediately contact the developer and convey the problem so that the concerned guy fix it quickly.
Tip: WHM > cPanel > Upgrade to Latest Version
3) Apply Brute-Force Security Logout
Brute-Force is a method related to trial and error. These trials have been attempted through software or application. The purpose is to decode and know the password.
The application brute-force will allow a particular number of unsuccessful attempts from the same IP. After a failure of the total login trials, the plugin blocked that IP for a specific time. There are several plugins you can use like “cPHulk Brute-Force Protection.” This software also allows exceptions. Through this feature, you can exempt your own IP as well as a list of IPs through “Whitelist Management.”
Tip: Login to WHM > Security Centersection> cPHulk Brute Force Protection.
4) Secure Apache & PHP
cPanel allows to build and compile Apache and PHP using EasyApache easily. It is the most readily available way to access a server is the web server application. You must secure your Apache installation.
Tip: Login to WHM > Softwares > EasyApache (Apache Update)
Enabling ModSecurity in your server is another method. You can define rules there. Those rules will check each request trying to access the server. If the call match with defined guidelines then the handler gives permission otherwise block such trial.
Tip: a. Login to WHM > Plugin > ModSecurity
b. Configure suPHP as the PHP handler and suEXEC for executing the CGI scripts in the user privilege. Permit suPHP and suEXCEC through below path:
WHM > Service Configuration > suEXEC
c. Change the PHP handler to suPHP, Turn Apache suEXEC to ‘ON’ and click Save New Configuration.
d. Allow PHP open_basedir safety for preventing PHP scripts from the root directory outside files.
WHM > Security Center > PHP open_basedir Tweak
e. Click the tick box to enable PHP open_basedir security. After enabling the checkbox click a button showing “Save”.
f. Now disable some essential functions by changing to register_globals: Off
g. Hit save button and reboot the Apache server once made all mention above changes.
5) Install a Firewall
I am sure that you have heard about the firewall. It is a barrier for the untraceable hit. Moreover, this shield also blocks all the unidentified software & connections to keep your online data secure. Thus, it is helpful to control such unauthorized accesses.
Malware software and virus affected files harm the systems. Attackers first try to add an infected file. Once they found such incorporation, then undesired data will be executed, and your server might be hacked for adverse consequences.
6) Protect SSH
SSH is the abbreviation of Secure Shell. It is a portal to access the server. The non-technical audience can understand SSH as a gateway to get entrance to the server. Change its default setting carefully as mentioned below:
Change default port
A default setting allotted by hosting company is “Port 22” which is known by numerous attackers. Select another number and change the value of port like Port 2255, Port 125, Port 521, or anything you want.
Disable login “Root”
A predefined login username is “Root” which should be changed to something else. Hacker knew that most people change the passwords but never tend to revise the login name. But professional IT concern always recommends changing it also.
Disable SSH v1
If you investigate for SSH protocol, you surely find the value “Protocol 2,1” that is insecure. Change it to “Protocol 2”.
7) Examine Plugin before Installation
Never assume that you are safe. Until an outside user is connecting with your server regardless of serving purpose or services availing purpose, the chances of being insecure are still possible.
Several folks are recently getting help from plugins established by an unknown developer. You don’t know how much do the programmer cared for the security. In fact, my experience is that most free plugins contain bugs and error. Hacker targets such plugin that will become a gateway for them. Therefore, I recommend either install a paid plugin or read the reviews and check it supports.
Moreover, numerously people integrate a plugin and notice after a few months that it is useless or the alternative is better than this. They use to disable it but not delete. It is one of a big mistake. Occasionally, visit this section and remove the unused plugin for maintaining the prevention.
Incorporate Innovation Carefully
As we all knew that technology is upbringing itself day by day. Inventions are influencing our routine life. We can’t live and survive without these innovations because we may be handicapped. Each assistant must contain both advantageous and harmful effects.
Similarly, the virtual world is introducing a fresh revolution. Thus competitors and attackers upgraded their cruel intentions as well. If we wish to remain safe, we need to avoid those updated but how do we grow the business in the robotic world.
In order to keep your confidential data and complete site secure, you have to set the safety parameters within the server. Mentioned above points are mandatory to keep your hosting server updated and secure.
About the author: Stella Lincoln is a web development engineer at Academist Help. She did her masters in computer science and had a vast experience of web application creation. Stella is scripting blogs atMHR Writer relevant to her field. She often guides young girls as career counseling. She loves cooking and watching IT related movies.
Domain names are crucial if you want to get any users to your website. A good domain name gets your site a ton of benefits like greater online visibility and a boost to your brand identity.
Because domain names are so important, the web hosting pros from HostingTribunalcreated an infographic with all the essential things to know about domain names!
As you are about to see, this infographic starts by breaking down domain names into three elements —the top level domain (TLD), the actual domain, and the subdomain. TLDs later get a section of their own and are thoroughly explained.
This is followed by a domain name timeline. It covers all the most important events that shaped what domain name are today. Here you can find everything from the invention of domain names, over the privatization of the domain name system, to the different US policies on domain name usage.
There is also a section on the domain name life-cycle. It covers all the phases the domain name goes through if you don’t renew its registration. This is important as once a domain name passes expiry, it gets significantly more difficult and expensive to restore it.
Following this are a series of interesting facts and stats concerning domain names. There are also some fun stories, including how Google almost lost its domain name.
Finally, no domain name infographic would be complete without a list of top domain name registrars. Spoiler alert: GoDaddy is at the top with over 57 million registered domain names. You can also find out how many millions the most expensive domain name costs.
There’s also some interesting info on the most expensive domain names and the influence domain names have on SEO.
All in all, if you’re looking for a comprehensive resource on domain names, this infographic is for you. Follow it and you’ll find out everything you need to know before registering your first domain name.
Did you know that as many as 60 million Americans have been affected by identity theft at some point of time? As fraud and data compromising is more common, more and more people fear for the security of data.
With app use governing every day of our lives, it’s never been easier for hackers to steal our private information. Even though antivirus and antimalware softwares are more advanced, so is the number of smartphone users ignorant to the basics of internet security.
While people are skeptical about their data, companies aren’t. According to an online survey by Ponemon Institute, 69% of all CEOs believe their antivirus software is all they need. Despite this conviction, many startups falter due to damage from data theft. To prevent any security breaches, use these 7 tips to keep your online data safe. It’s much easier than you thought it would be.
1. Use strong passwords
It may sound weird when we emphasize this. Although many deem this tip as common knowledge, the majority isn’t aware of the importance of password efficiency. The main reason for this is that people afraid they will forget a more complex password.
To prevent themselves from forgetting (even though password storing software like 1Passwordexists), internet users resort to using simple numbers, rows of letter or simply – password. As a result, experts deem 86% of all passwordsterrible.
The traditional advice for setting passwords includes using “random capitalization, numerals and a few symbols.” However, this form of password security has two distinct flaws:
– According to the National Institute of Science and Technology (NIST), using this mix of symbols is much easier for hackers to crack with various software. Since these passwords occur a lot, it’s easy to predict the diversity of symbols and then assess each one.
– It’s hard to remember. How often do you use “m7dSo0__2 #F@” every day? If the worst-case scenario comes, you will have to remember your password manually.
So, how does one set the perfect password? The NIST recently updated their guidelines. Nowadays, the best passwords are comprised of memorable long phrases, comprised of common English words.
Use them in odd combinations, such as “Potato comprehensible dock puddle.” By doing so, you make the password will be much harder to crack, as well as harder to forget.
Paint a vivid picture with words in your mind and pick the three or four representative terms to make a password.
2. Use a VPN
Even with stricter laws on data privacy, you can never know who is watching your browsing history and collecting your data. One of the most common countermeasures from data theft (both by thieves and the government) is installing a VPN on all devices that have internet access.
So, what is a VPN anyway? By definition, VPN stands for Virtual Private Network. It’s a form of a private connection that “spoofs” ISP, government trackers and anyone else watching you. Your online address is seen by others as in another part of the world.
For example, you can select your virtual address to be in Serbia or Indonesia or Australia or just anywhere you want to. And you will be untraceable – something like a virtual ghost.
VPNs have become more than just a commodity for people who do illicit activities. Here are just some ways your online data is secure due to the use of a VPN:
– You can bypass possible tracking in your office/college/high school. Although it isn’t officially confirmed, some facilities disregard the privacy of their students and employees. With a VPN, you can bypass all the restrictions on office or school computers.
– Connect to public WiFi networks without fear. Many hackers with knowledge in internet architecture use the WiFi baiting method. They set up a fake open WiFi, and people connect to it, only to have hackers steal their data. VPN shields you from such attacks.
– If you’re a journalist or activist, VPN can save you from legal prosecution by a government or regime.
3. If you own a blog/website, use VPS hosting
VPS stands for Virtual Private Server. It’s anew form of website hosting, much more different than traditional forms of hosting on physical servers. One of the main risks in the world of cybersecurity is using physical servers.
Why? Due to many websites sharing the same server, the attack on one can quickly lead to a breach within other websites, as well. To mitigate risks and be sure that your website is safe from DDoS attacks, pick a VPS service.
With VPS, you have full root access. This means you have total control over the server, making it much harder for anyone to steal your online data.
In shared hosting, a bad user can affect the performance of other websites. VPS hosting provides you with reliability. Even if an attack happens, you will know that there are no holes in the system for the attackers to enter through.
Even if the worst-case scenario happens, data recovery is easier with multi-network hosting. You will be registered on different domains and much less prone to successful takedowns.
4. Be careful of the websites you visit
Even if you take all the necessary precautions to protect your online data, it’s all in vain if you’re not careful. There are two types of unsecure websites:
– Websites which were purposely created to steal online data from internet users
– Cases where the owner doesn’t invest into security enough, leaving the website prone to exploitation
To know if a website is secure, look for these two apparent signs:
Check if the website has a secure URL – https instead of http. The S means secure and is a sign that the site uses a different security certificate, the SSL (Secure Sockets Layer). This is the best guarantee that the website doesn’t misuse your data.
A green security address feature in the bar, usually accompanied with a lock icon is another sign of website security. Seeing this means that the website is using the highest validation level possible, the Extended Validation (EV).
5. Use cloud storage and avoid keeping your files on a physical drive
One of the most common ways hackers steal your online data is keeping it on a physical drive. This means that every piece of information has a constant source that can be reached at any time. Businesses often become victim of cyber attacks because they leave everything on a hard drive. There are two ways you can bypass these dangers and use the cloud:
1. Outsource important project plans, business reports, and whitepapers. Services such as Xpertwrtiers.com, Assignment Holic andCollege Paper can deliver the needed task to you, without the need to keep it on a company computer.
2. Use Google Drive. Even the most complex projects are not that difficult due to the many features of Google Docs. During project creation, Google will store every bit of information on Google Drive, its cloud service.
6. Analyze privacy policies and settings on every website you visit
In the world of cybersecurity, there are many practices which harm the user but aren’t illegal. Therefore, many websites encourages them. Of course, when you read them, it’s clear that they are detrimental to your privacy. To prevent visitors and customers from realizing this, most websites use a myriad of practices designed to make it seem less obvious.
Most countries have laws which require websites to state which data they collect from users. Although they have to state this, websites try to cover it up. They store it in sections of the website that are far to reach, the paraphrase or even don’t state everything.
Be meticulous and search the entire website. By doing so, you will be able to exit the website the moment you notice something fishy.
7. Avoid using real name and information unless necessary
This particular way of maintaining data security is easy, but many people disregard it. You would be surprised how much people can find out about you using your name, email, and date of birth.
The detail here draws the conclusion that perhaps the best ways of keeping online data secure is – not providing it! If you use Facebook and Instagram for personal connections, then feel free to put your real name.
Is there a reason you can’t use a fake name and email if you’re subscribing to a sports website or blog? No? Then it’s recommended to use your real name and verify your account with a phone number. The verification takes only a few minutes to create but can be your best defense against data theft.
Keeping your online data free is a process which involves planning and patience. Don’t provide any unnecessary data, cover your activity with a VPN. For your business, revert to VPS hosting and never leave any reports or other pieces of sensitive information on a physical drive. Be responsible and your data will be safe.
About the author: Scott Matthews is a software architect and SaaS marketing expert. His software consultancy and project reports helped sites like Paper Writing Pro and DoMyWritingbecome popular and more acclaimed. In his spare time, Scott loves diving and hiking, along with his childhood favorite sport – basketball.
Getting the right hosting is not as easy as you might think.
Magento is a demanding platform that needs an extremely robust infrastructure to function well. This is especially true for the most recent iterations, Magento 2.0.x and above.
Whether you are not happy with your current hosting provider or need a home for a brand new project, we’ll help you make the right decision.
And the first step to choosing the best web hoster is to ask the right questions.
#1 Get the Right Hosting Solution
Choosing the right Magento hosting provider starts with assessing your needs and understanding what exactly you are looking for.
There are 3 broad categories here that will determine how you will move forward from now on:
Shared hosting.Shared hosting is a popular choice for Magento store owners who are looking for a way to cut operational costs and do things on a budget. It is not necessarily a bad choice – especially early on.
Shared hosting is a decent option for startup Magento entrepreneurs who are only entering the market. They don’t know yet how many visitors will get or what their peak load will look like. And since they are so new, a shared hosting solution will work for them fine for the first few years.
Our only advice here is to not go for the cheapest option. Choose the next best option. More often than not it will give you enough horsepower to deal with the daily load and at the same time leave you around 20% of spare computing power to get some breathing room and manage occasional user spikes.
Dedicated server. This is the best choice when you know exactly what you are doing, how much visitors you will serve at once when your site has peaks and downtime. Basically, this is a smart solution when you know all the ins and outs of your store and are looking for new hardware to move to. Dedicated servers are rarely the first solution for an aspiring Magento merchant.
They are more common for merchants upgrading from shared hosting or moving from a cloud hosting platform in search for better customization and control over your hosting environment.
Cloud hosting. Cloud hosting is a great option for web stores that have uneven load periods. For example, if the load periods are heavily influenced by seasonality or certain events (Christmas gifts, music festivals, meetups, other one-time events).
Cloud hosting automatically upscales and downgrades the web store to meet this demand and then shrink back to normal. This will be extremely hard to achieve on any other platform since building up the infrastructure is both an expensive and time-consuming process.
#2 Ensure You’d Have a Strong Support Team
Magento is not easy to configure in the right way for smooth sailing. Choosing a hosting server that is specifically optimized for Magento hosting will spare you a lot of unnecessary headaches.
In addition to the right configuration, you’ll need a strong support team that knows their way around Magento. Whether you are using a shared hosting or a dedicated server, you’ll probably need to get the help of the support team to move forward, even if rarely.
When your hoster’s support team doesn’t have a clue how a website running Magento is different from other content management systems – you are in trouble. This situation invites all sorts of issues. From the inability to install specific server-side solutions to problems with server tweaking.
Not all hosting providers are created equal. This one is claiming 2 seconds TTFB (time to the first byte). Is this good? Not really. An optimal speed would be 200 ms – which is 10 times lower! Always consult independent sources when you are doing your research. Google claims that TTFB must be 200 ms, not 2,000!
#3 Look for a Solid CDN and Caching Support
Once you understand what kind of hosting you need, it’s time to move on to additional features. We recommend you to set up CDN service right from the start. It’s not a huge expense overall. But the benefit of high website speeds for all your customers, no matter where they live, will be huge.
That’s one of the reasons we focused on Tip #2. If you choose a dedicated Magento hosting provider, you’ll have your website set up faster and get essential tools that most Magento stores need anyway.
CDN or Content Delivery Network is a service that works as an additional layer between your web server and the user. CDN uploads your static content (images, HTML pages, and documents) to a network of servers all over the world. This means that when a user from Asia enters your website, they will download all these files from the CDN server nearest to them, shaving valuable time off their wait.
Shopping online at a Magento store without a decent cachingsolution is painfully slow – so much so that Magento dev team strongly recommends you to use Redis and Vagrant for all stores in production.
Make sure your hoster fully supports all these options and if needed can offer you help in installing them.
#4 Find Out How Your Future Hoster Handles Backups
Backups are important for unexpected hardware meltdowns, hacker attacks, human error, and just for peace of mind. A good backup system serves as a guarantee to an uninterrupted business operation and good company image.
There’s no such thing as too few backups. And your new hoster should know that.
Find out:
– how often your hoster backs up your data
– whether they have an emergency plan if anything goes wrong
– how many backups are there
– when old backups get deleted
– how long will it take to restore your website from a backup
Ideally, there should be at least daily database backups which will allow you to restore your DB without losing too much data. As for media and Magento files, look into options that offer at least weekly backup schedule.
#5 Read Customer Reviews to See What Issues Your Potential Hoster Has
This should be the last stop on your journey to find a good hosting provider for your Magento store. Read what other people have to say about the service. Write down all the concerns they mention that are most important for you.
When you have the list ready, email your future provider and ask them whether the situation has improved, what was done to mitigate so-and-so, if they have new infrastructure and solutions in place to deal with all these challenges.
Even though a good support team can help you deal with most issues, you’ll still need at least a few dedicated Magento developers to tackle challenges that are out of scope of basic hoster-side maintenance.
Pro Tip: you can judge by the time they take to answer your email how much this hoster values customers and willing to tackle their concerns in an efficient manner.
About the author: Vasili Nikolaev likes his coffee black and your Magento stores fast. He works with Onilabto create a world where all websites load under 200 ms, as Google once envisioned.
In the wild wild web terms, the rabbit almost always beats the turtle.
Website load time statistics from numerous studies clearly show that if the average page load time exceeds 3 seconds, the abandonment rates go up. High bounce rates are sending info to search engines that visitors don’t find the website useful, which, of course, affects the ranking directly.
And if that wasn’t enough, the numbers clearly show that shoppers avoid returning to e-commerce sites with performance issues.
The marketing truism that there is no negative publicity doesn’t coincide with the digital reality of social media and interconnectivity. Nearly half of the users share negative experiences with their peers, spreading the word of heavy, unresponsive sites faster than said web pages load.
As the Hitchhiker’s Guide to the Galaxy points out:
“Nothing travels faster than the speed of light with the possible exception of bad news, which obeys its own special laws.”
But how precious is a single second online exactly?
– A website page that loads in 6 seconds have a 106% higher bounce rate probability compared to a page with a load time of 1 sec
– For web pages with a page load time of 10 seconds the bounce rate probability increases by 123%
– 39% of online visitors abandona site if the images don’t load quickly
– 74% of mobile internet users leave a site that doesn’t load within 5 seconds
These are a few stats from the impacts of speed on website performancegraphic which make it pretty clear that speed matters and slow loading speed equals to high bounce rate.
Internet users, both desktop and mobile ones, are not willing to waste time waiting for a site to open, even if it’s a high-quality one.
But why you should care about bounce rate?
For the record, bounce rate shows what percentage of your total site visitors leave your site without opening any other page than the one they land on.
High bounce rate is not good for your online business for many reasons, which we’ll discuss shortly. First, it is important that we underline one important fact: the term ‘high bounce rate’ can be deceptive at times.
This is because there’s no one fixed benchmark for all sites. A high bounce rate in one business niche might be perfectly acceptable in another.
That said, if your site’s bounce rate is higher than the average bounce rate in your business niche, you’ve got a problem in your hands.
High Bounce Rate is Not Good For Your Business
A high bounce rate, as you may guess, means a large portion of your website visitors are spending too little time on your site. This, in turn, implies you’ll have fewer opportunities to engage your visitors.
After all, if visitors are abandoning your site quickly, how can you have a valuable conversation with them?
If you are a blogger, an increased bounce rate signifies that fewer people are actually reading your post, and perhaps even fewer are sharing them on social networking sites.
On the other hand, if you’re an owner of an e-store, a high bounce rate can mean fewer new customers. In addition to that, you may also have to live with fewer repeat customers because reports show that 79% of online shoppers are less inclined to shop again at a site whose performance is not up to the mark.
To make the matter worse, your loss is likely to prove to be your competitors’ gain. According to a survey, 43% of internet buyers will take their business to a competitor if their shopping experience was below par.
To sum it up, a high bounce rate can badly hurt your online business and you need to keep it below the average mark for your niche.
To do so, you might need some tweaks to improve your website technical performance, especially the loading speed and A/B tests on your website designs, especially the homepage to make the website content consumable.
Tips To Decrease Bounce Rate
The first and the most important of all tweaks to improve your loading speed is to find if your host has better response rates to serve your website resource on to clients browsers in time. If GTmetrix and Google page speed insights are showing that your website is loading slower than the global average, you might want to consider changing your host.
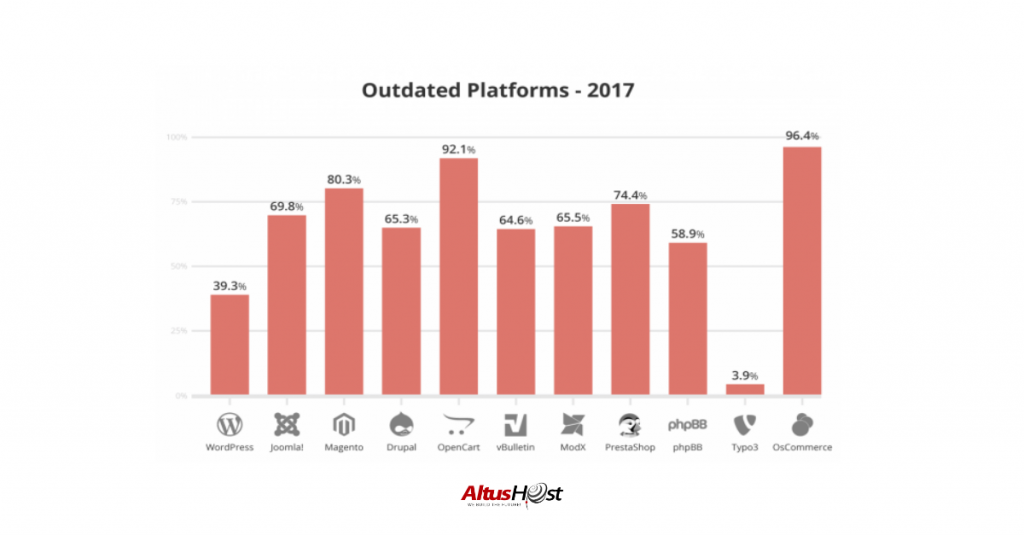
Approximately 31.9% of all websites around the globe use WordPress as their content management system (CMS), and another 50,000 new sites appear every day on the Internet which also use WordPress. If that isn’t enough to convince you that WordPress is the dominant player in the CMS market, consider also that of the top 10,000 websites on the Internet, 3,845 of them are powered by WordPress. Obviously, all that is great for WordPress, but there’s a slight downside to having that kind of popularity – the CMS giant is also the most popular target for hackers who are trying to penetrate the security system of websites and networks.
Because of its worldwide popularity and overwhelming dominance as a content management system, it’s the one CMS which is constantly targeted by criminal-minded individuals seeking to hijack website data and hold it for ransom or to carry out other kinds of security threats. That doesn’t mean that WordPress has an inherently weak security system – just the opposite, in fact. But regardless of how robust its present security system is, prior versions of WordPress remain installed to a large extent, and those are the ones most vulnerable to attack. If you refer to this updated WordPress stats, of all WordPress sites which are hacked, 39.3% are versions prior to the most current one, simply because they don’t include the latest protections.
1. Make sure that you are using the current version because that’s the one which will include all the most current security features
2. Keep all plugins current, because they are also subject to attack, especially to the newest cyber threats on the Internet
3. Follow some of the recommendations listed below, because these are proven techniques for discouraging cyber attacks.
Discourage brute force attacks
While it’s almost impossible for any human to guess a correct password and username to gain entry into your WordPress system, it’s much easier for a computer to guess it. This is particularly true of WordPress sites, because the system will allow you to keep guessing a password or username, even if you continue to enter wrong entries.
This is, of course, a default situation which you do have the capability to change, but many people are not aware that it can be changed, and they leave the default behavior in effect. That makes your WordPress site vulnerable to a brute force attack.
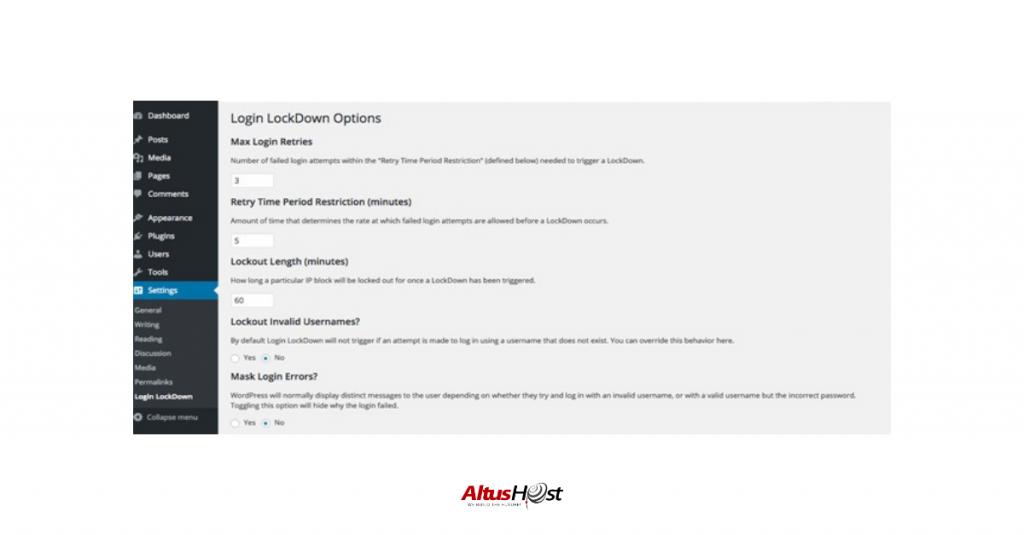
In order to prevent this from happening, you can use a simple plugin which blocks the IP address of any user attempting to gain access to your site after a specified number of incorrect entries. Once you’ve installed the Login Lockdown plugin, this vulnerability will be closed up, and brute force attacks will no longer be possible.
Rename your WP login URL
WordPress allows everyone by default to login simply by navigating to the wp-admin or the wp-login.php URL which is available on your website. Everyone, including hackers, are aware of this fact, so anyone with criminal intent will know exactly where the login page is situated, and that makes it vulnerable to various types of security threats.
However, if hackers don’t know where your login page is, they won’t be able to target your site with any of their attacks. The most effective way of hiding your login page and preventing cyber criminals from locating it is to simply rename the URL. You can use Login Lockdown (as suggested above) to rename your login page URL so that it has a custom string of your choosing. Once this plugin is activated, it will redirect all attempts to reach wp-admin back to your homepage.
There is a crude, yet effective way to change the name of your wp-login.php file. All you need is access to your site’s files and manually create a new login file. Here are the steps:
Create a new file
1. Copy the code from your wp-login.php, then paste it into your new file.
2. Replace each instance of wp-login.php with the new file name. You can use the shortcut key find and replace to help you.
3. Delete the old wp-login.php file.
Login through your new URL.
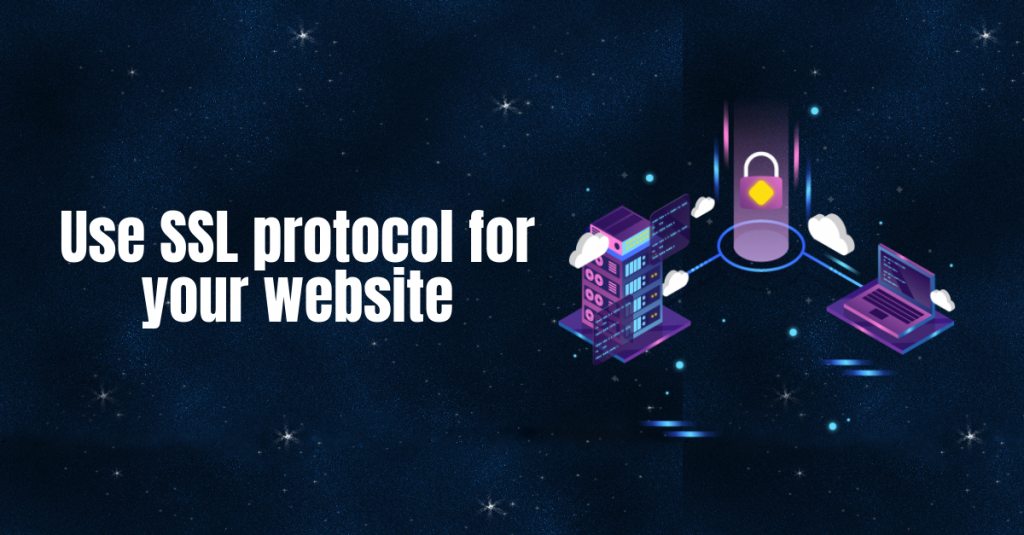
Use SSL protocol for your website
One of the defense lines you should be using for your WordPress website is to have a secure sockets layer (SSL) protocol installed because it guarantees that any connection between two websites is secure. Whenever two websites are connected, tons of information and much of that information would be considered sensitive.
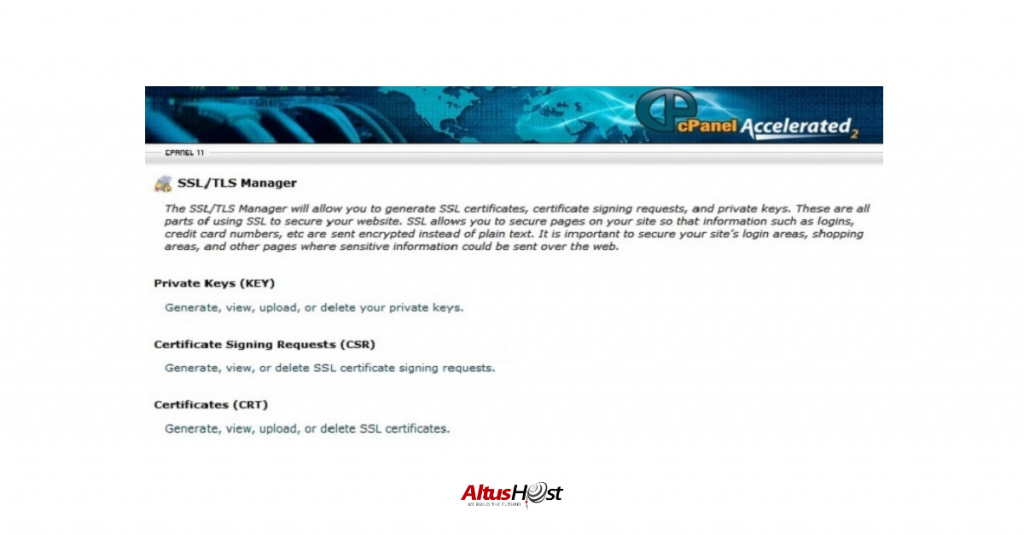
There are various types of SSL you can get for your WordPress site. AltusHost offers you 3 types of SSL certificates that you can use for your WordPress site. You can easily install a SSL certificate from the cPanel by following the steps below:
1. Login to your cPanel.
2. Under ‘Security’ options, click on ‘SSL/TLS Manager’
3. Under ‘Install and manage SSL’, select ‘Manage SSL Sites’
4. Copy your certificate code including —–BEGIN CERTIFICATE—– and —–END CERTIFICATE—– and past it into the ‘Certificate: (CRT)’ field
5. Click ‘Autofill by Certificate’
6. Copy and paste the chain of intermediate certificates (CA Bundle) into the box under Certificate Authority Bundle (CABUNDLE)
7. Click ‘Install Certificate’
Without the SSL protocol installed, most of the information is sent back and forth in ordinary text. That means if it were to be intercepted by a hacker, it could easily be stolen. This can’t happen with the SSL protocol installed, because it uses an encryption algorithm which makes the data unreadable without having a key.
Implement two-factor authentication
Ordinarily, you can log onto a website simply by supplying a username and password, and this is known as single-factor authentication. To increase the difficulty of having anyone hack into your system, you can implement two-factor authentication, by requiring a secondary means of user identification.
Once a user correctly supplies username and password, you can then ask them for their mobile phone number so you can send a single-usage pin number to that phone. The pin number would then have to be entered on the screen in order to gain access. Alternatively, after entering a username and password correctly, you could ask the user to answer a secret security question, which they have previously provided the answer for. Two-factor authentication can be installed by using a free plugin already available.
Only allow logins by email
It’s much easier to guess someone’s username than it is to guess their email address, especially since email addresses tend to be much longer. You can improve your website’s security by forcing users to login with their email address rather than a username.
Any hacker who is trying to guess an email address would have to know the characters needed for the local portion of the address as well as the domain name, and the top level domain. This makes it much harder to guess, even when using a computer to stage a brute force attack. To prevent users from logging in with their username and to force the use of an email login instead, you can install the WP Email Login plugin.
Password protect your admin directory
You can add an additional security layer to your system by requiring a username and password before allowing anyone to access the wp-admin directory. This would force any criminal-minded person to guess two sets of usernames and passwords in order to gain entry to your system. The easiest way to implement this is if you are system is situated on an Apache Web server, because Apache makes it easy for you to password protect any directory whatsoever on your system. If your system is not supported by Apache servers, you can still do it manually by interacting with your operating system, or by installing the free plugin called AskApache Password Protect.
Disallow file editing
WordPress permits administrators to edit any plugin file and any theme within the system. Since this is true, if any of your admin accounts are hacked successfully by a cyber criminal, he/she would then be able to insert harmful or malicious code into your existing code. Worse than this, when such a penetration occurs, it’s virtually undetectable, so harmful activities can be carried out in the background without you ever being aware of it.
The only way to prevent this is to disallow file editing, and this can be accomplished by simply adding a line of code into your wp-config.php file. Here’s the line of code that you should add:
define(‘DISALLOW_FILE_EDIT’, true);
Once you’ve inserted this simple line of code, it will have the effect of disallowing any kind of file editing from your WordPress dashboard, and you will have an extra layer of security in effect.
The tips above are simple yet useful to boost the security of a WordPress website especially when it’s a new one. If you want a customized environment for your WordPress site, it’s recommended to host it with a WordPress hosting. You will get the optimized performance, security and ease of use for your WordPress site.
About the author: Jason Chow is a fan of technology, WordPress, and entrepreneurship. He is an outreach manager for WHSR and WebRevenue.io. Jason is also a marketer – he likes to read news related to startups and Internet marketing